Model Builder
Processing → Model Builder builds a processing workflow as a graph: wire the output of one tool into the input of the next, then run the whole chain as one job. A saved model can be re-run on other layers, exported to a file, or turned into a Python script.
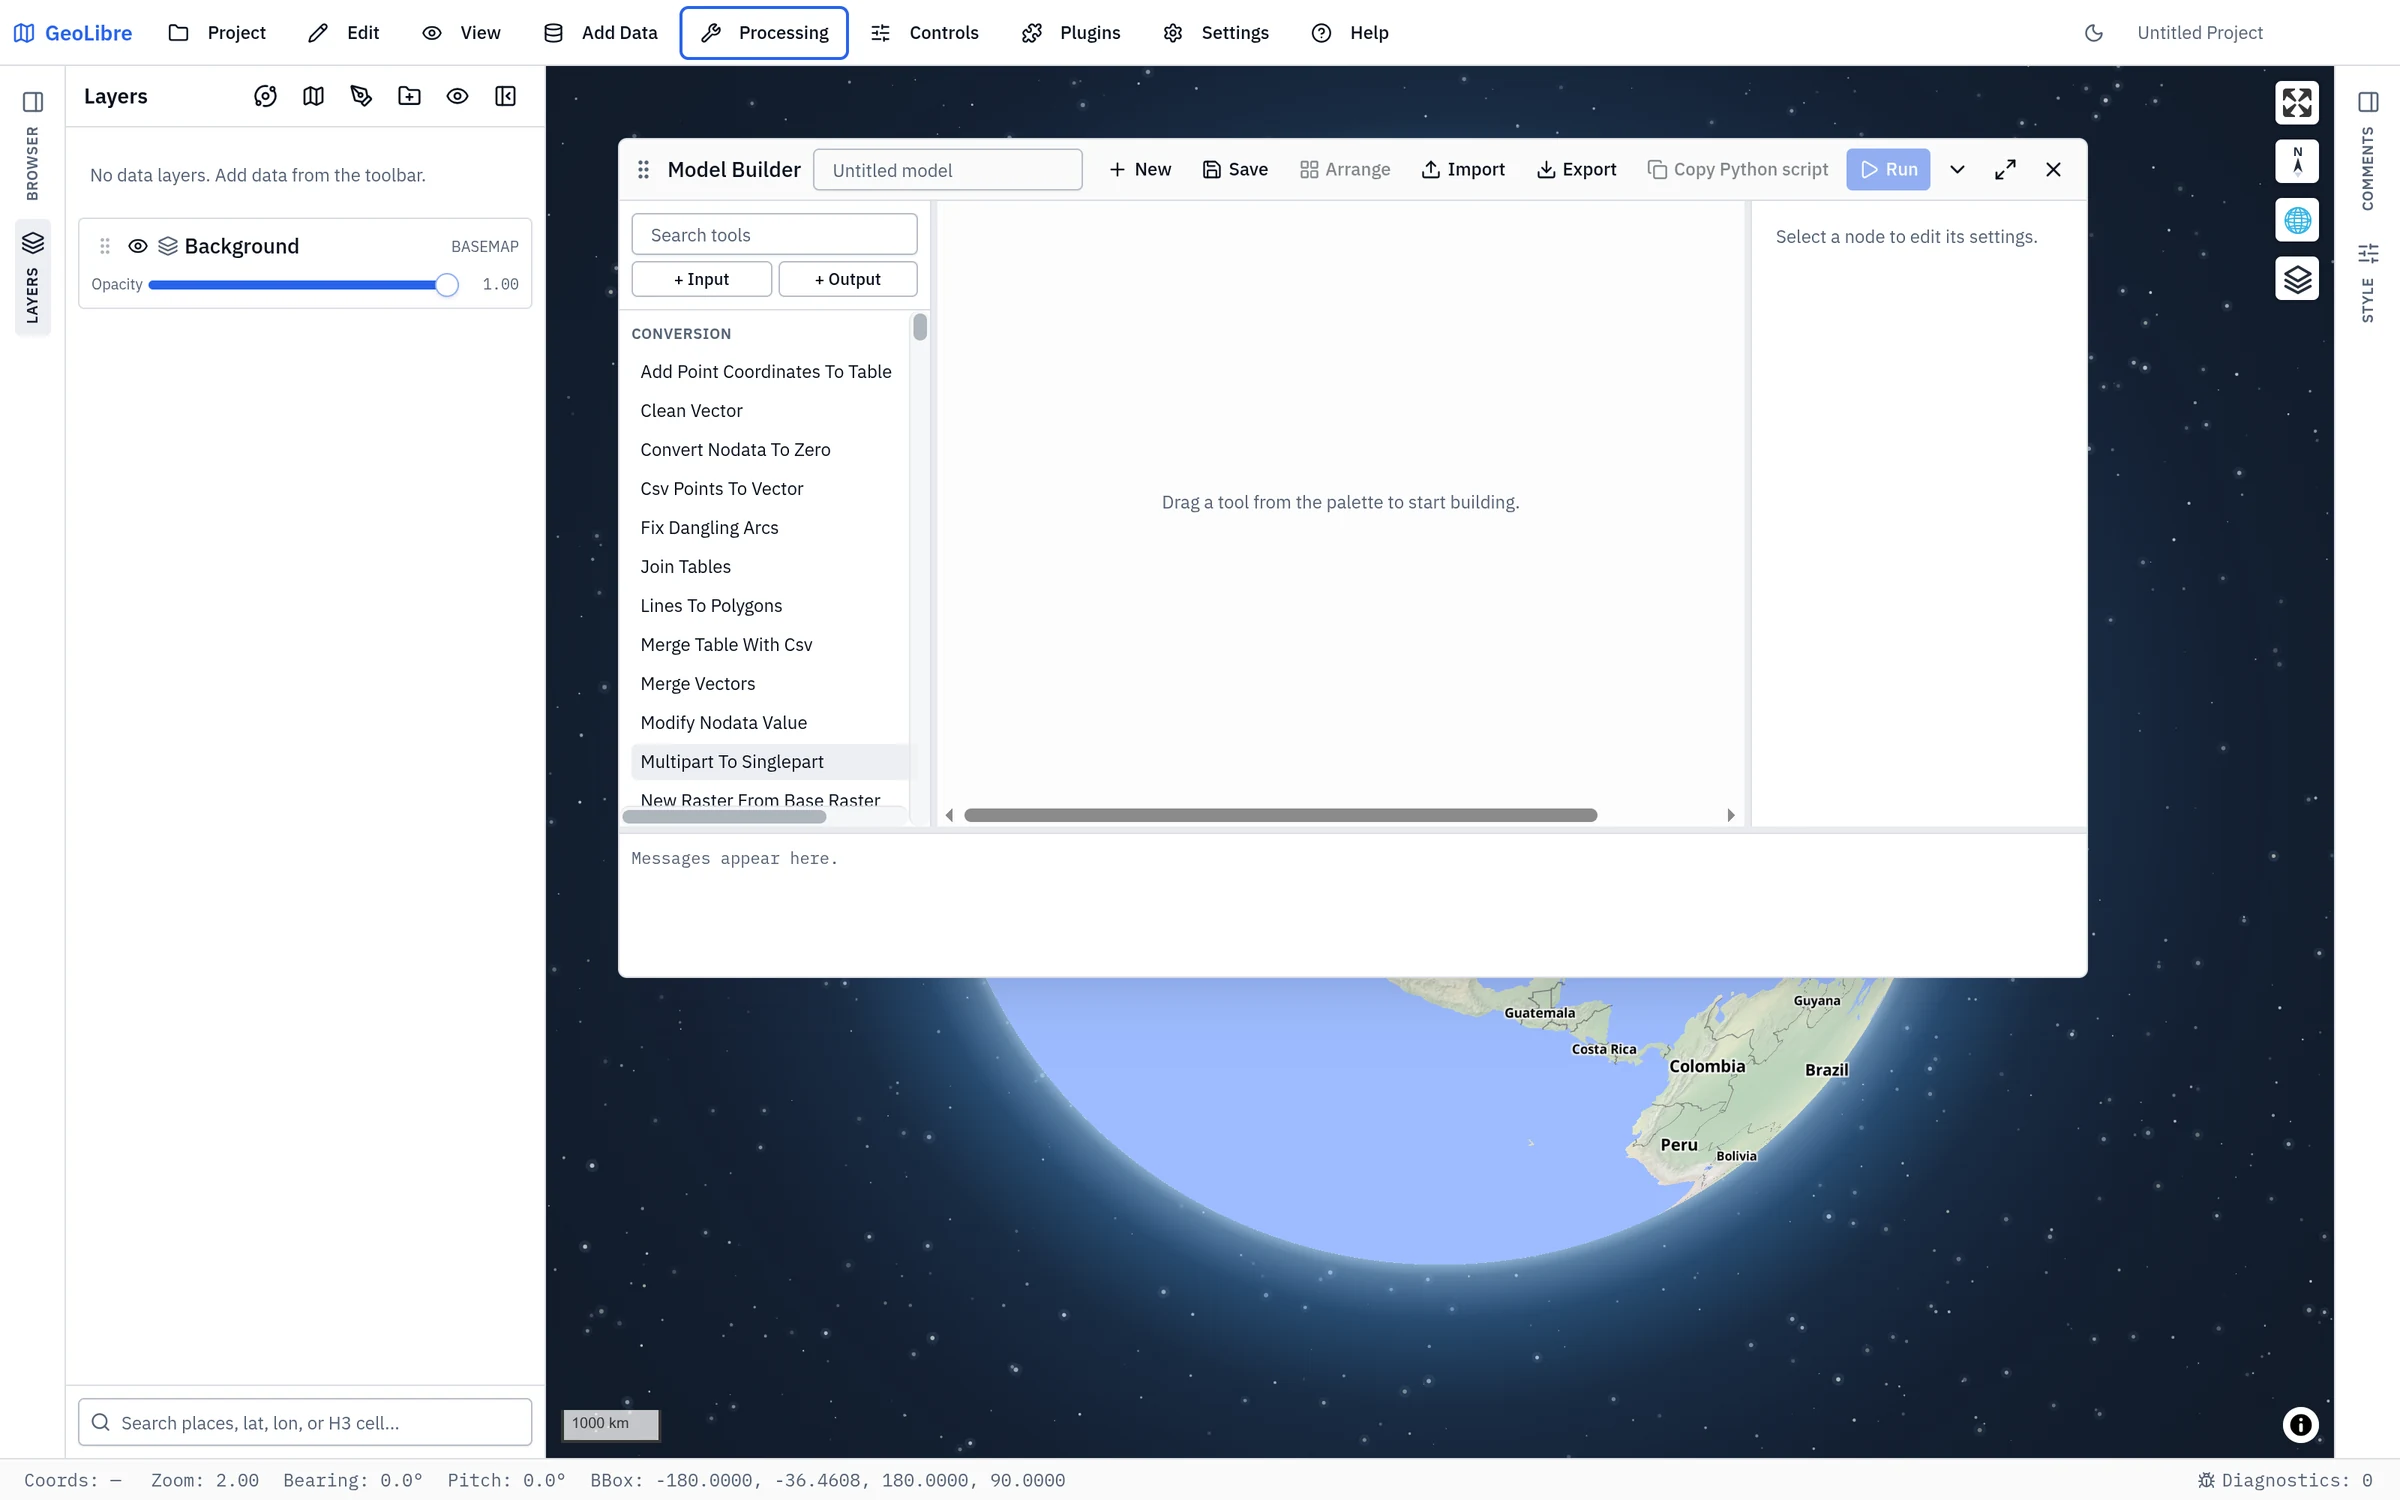
Model Builder opens as a floating panel over the map that you can move, resize, maximize, and minimize. The tool palette is on the left, the canvas in the middle, the selected node's settings on the right, and the message log along the bottom. Drag the splitters between them to resize the columns. On a narrow screen the palette and settings become toggle buttons.
The title bar
| Control | What it does |
|---|---|
| Model name | The model's name (Untitled model until you name it). |
| New | Start an empty canvas, asking first if the current one has unsaved changes. |
| Save | Store the model in the project. See Saving and sharing models. |
| Arrange | Lay the nodes out left to right along the flow. |
| Import / Export | Read or write a .model.json file. |
| Copy Python script | Copy the equivalent geolibre Python code. See Python export. |
| Run / Cancel | Run the model, or stop a run in progress. |
Building a model
Nodes
A model has three kinds of nodes:
- Input: a layer from the project that feeds the model. Pick it under Source layer in the settings panel. Add one with + Input.
- Tool: one processing tool. Its parameters are set in the settings panel.
- Output: a result that is added to the map when the model runs, named by its Result name. Add one with + Output.
The palette offers the client-side GeoLibre Toolbox
vector tools and the open Whitebox tool catalog.
Type in Search tools to filter it, then drag a tool onto the canvas (or click
it, or press Enter, to add it at a default spot).
There are no value or parameter nodes, loops, iterators, or conditions: every model is a straight data flow from inputs to outputs, and a model that contains a loop is rejected.
Connecting nodes
Drag from an output port (on the right of a card) to an input port (on the left). From the keyboard, activate an output port to arm it, then an input port to connect them. Each port carries vector data, raster data, or either, and ports that carry different kinds of data cannot be connected.
- Connecting to an input that is already wired replaces the old connection.
- Click a connection's curve to remove it.
- Remove a node with the trash button in its settings panel.
A tool input that is not connected can take a layer chosen directly in the settings panel instead, which is how a one-tool model gets its data.
Drag node cards to arrange them by hand, or press Arrange to lay the graph out automatically (this replaces your own positions). The canvas scrolls to pan; it does not zoom. There is no undo or copy and paste inside Model Builder, so export a copy before a large rework.
Keeping intermediate results
Only results connected to an Output node are kept; everything in between is discarded after the run. To keep an intermediate result, select its tool and press Keep this result (or Keep "port" for a tool with several outputs), which adds and connects an Output node for it.
Checking the model
The canvas checks the model as you build it and lists each node's problems in red in its settings panel:
- Choose an input layer.
- "port" needs a connection or a value.
- "port" already has an incoming connection.
- Those ports carry different kinds of data.
- The model contains a loop.
- Add an output node to keep a result.
- Unknown tool "tool"., or a connection to a node or port that no longer exists.
Run stays disabled until the model has no problems.
Running a model
Run executes the nodes one at a time, each after everything that feeds it. Node cards show whether they are running, done, or failed, and the log at the bottom shows each tool's own messages.
- Vector tools run in the browser.
- Whitebox tools run through the in-browser WebAssembly runner, in the desktop app as well; Model Builder does not use the Python sidecar.
- Each Output node adds a new layer to the map: a GeoJSON layer for vector results, a GeoTIFF for raster results.
- The run stops at the first node that fails, and reports Run failed: …. Outputs added before the failure stay on the map.
- Cancel stops the run before the next node starts. A Whitebox tool that is already running finishes first.
Saving and sharing models
Save stores the model in the project's .geolibre.json, so it travels with
the project. Saved models are listed under Saved models below the canvas;
pick one from Load a saved model... to open it, or Delete to remove the
saved copy (the canvas is left as it is).
Export downloads the model as <name>.model.json, and Import opens one.
The file holds the graph: its nodes (inputs, tools with their parameters, and
outputs, with their positions) and the connections between them:
{
  "$schema": "https://geolibre.app/schemas/model-graph-v1.json",
  "version": "1.0.0",
  "name": "Roads buffer",
  "graph": { "nodes": [ ... ], "edges": [ ... ] }
}
An imported file must be a GeoLibre model, no larger than 16 MB, 2,000 nodes, or 4,000 connections. An Input node stores the id of its layer, so after importing a model into another project, choose each input's Source layer again.
Python export
Copy Python script becomes available after the current model has run
successfully. It copies a script that hands the whole graph to the
geolibre Python package, which asks the app to check and run
it and returns the ids of the output layers:
# Generated by GeoLibre Model Builder.
# Run with the model's input layers loaded in the displayed map.

m.run_model_builder({"nodes": [...], "edges": [...]})
m is a displayed geolibre.Map, in a notebook or the
Python Console. The model's input layers must be loaded in
that map. run_model_builder takes an optional timeout in seconds (600 by
default).
Building a model with the AI Assistant
The AI Assistant can author a model from a plain-language description, such as "buffer the roads by 100 m and clip the result to the county". It looks up the tools, checks every parameter against the tool's definition, saves the model to the project, and opens it in Model Builder for you to review before you press Run. It asks before replacing unsaved work on the canvas.